
Developing and testing changes to U-Boot can be a tedious and manual process if you constantly have to disconnect and update the boot storage medium used for every change. A more convenient approach with a shorter feedback loop is to upload the changes directly to the target’s memory or even file system while the target is running. This could be an entirely new U-Boot image, a device tree or other files or binaries related to the changes you wish to test. Moreover, this process can be scripted and integrated into automatic build or test workflows.
Prerequisites
To get started you need a target with a working U-Boot base image that’s loaded on device reset. This is required to establish serial communication with the target to run commands and transfer data. It also serves as a fallback in case something goes wrong, allowing you to simply reset the device and try again.
In this tutorial we’ll use ckermit on a Ubuntu 22 host to manage the serial connection. Install ckermit with apt:
sudo apt install ckermitRunning ckermit interactively
Launch ckermit with the ‘kermit’ command to start an interactive session. We specify the port and baud rate with the SET LINE and SET SPEED commands:
SET LINE <path/to/serial_target>
SET SPEED <baud_rate>
Note that you may have to add your user to the ‘dialout’ group to have permission to open serial devices.
Next you might want to disable both flow control and carrier watch by running the following commands:
SET FLOW-CONTROL NONE
SET CARRIER-WATCH OFF
Consult the ckermit command reference for more information and make the required adjustments depending on your hardware configuration.
Now run ‘CONNECT’ to connect to the target and verify you can interact with the U-Boot command line as expected.
Before we return to the ckermit REPL we prepare the target for file transfer by running the ‘loadb’ U-Boot command:
loadb <start-address>
To return to the kermit repl first type the prefix sequence ctrl + \ and then c.
Next we enable prefixing for all data packets
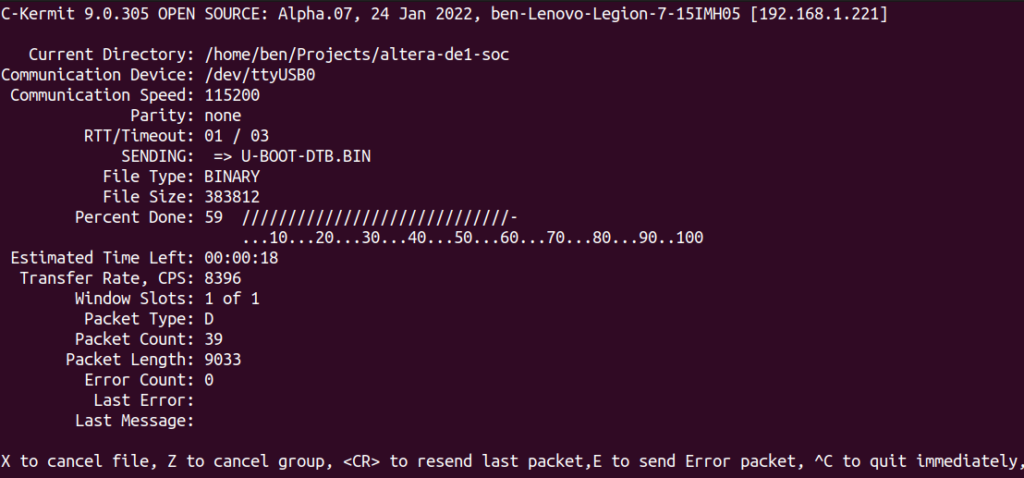
SET PREFIXING ALLand then transfer the file with the ‘SEND’ command:
SEND <file_path>Important note: Make sure to write to an available place in memory not occupied by any data or binaries already in use.
Automating file transfer
It’s possible to create a script using the same commands as we ran interactively to automate the file transfer process.
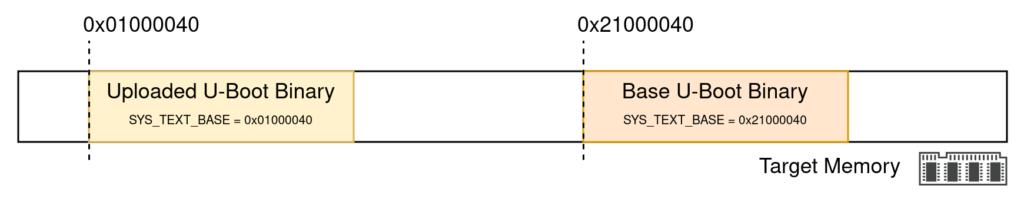
Below is an example script where we upload and run a U-Boot binary to the Altera DE1-SoC. In this particular example the load address has to match the address defined by SYS_TEXT_BASE which is where U-Boot expects to be relocated by the SPL. We also make sure not to overwrite the existing U-Boot binary as this may cause undefined behavior. As seen in the simplified memory map below, we have a base working U-Boot image in a different location and thus a different SYS_TEXT_BASE compared to the incoming image that we’re uploading.
The ckermit LINEOUT command sends a message to the target followed by a carriage return allowing us to send and execute commands on the target from the script. To prepare the target for transfer we send ‘loadb’ followed by the address of SYS_TEXT_BASE for the incoming U-Boot binary. After the transfer is finished we start the new binary by sending ‘go’ followed by the same SYS_TEXT_BASE address.
After transferring and starting the new binary a simple echo command is sent to verify that the newly upload U-Boot image is working as expected. The INPUT command is used to read and verify that the response from the target.
We also test at every step and exit early with an error code and message in case something goes wrong.
# PARAMETERS
# 1. Serial device
# 2. Baud rate
# 3. Load address
# 4. u-boot binary path

# Specify serial device and baud rate
SET LINE \%1
SET SPEED \%2

# Required configuration
SET FLOW-CONTROL NONE
SET CARRIER-WATCH OFF
SET PREFIXING ALL

# Reset device to return to base u-boot
LINEOUT "reset"
MSLEEP 1000

# Run loadb <addr> command on device
LINEOUT "loadb \%3"
IF FAIL EXIT 1 Unable to communicate with device
MSLEEP 100 # Paranoid
SEND \%4
IF FAIL EXIT 1 Sending binary failed
MSLEEP 100 # Some sleep here is required
LINEOUT "go \%3"
IF FAIL EXIT 1 Unable to communicate with device

# Verify that new U-Boot binary is responding
SET INPUT ECHO OFF
INPUT /CLEAR /NOMATCH
ASSIGN \%m "hello"
ASSIGN \%c "echo \%m"
LINEOUT \%c
INPUT /CLEAR 1 \%c
IF \v(instatus) EXIT 2 Failed to send test cmd
INPUT /CLEAR 1 \%m
IF \v(instatus) EXIT 2 Did not receive expected message

ECHO "Success: Target responded with expected message: \v(input)"
EXIT 0
Note that we’ve generalized the script by taking arguments denoted by the 1-indexed \%N syntax as shown. Positional arguments are provided as a space separated list after the equals sign as shown below:
kermit <script_file_path> = arg1 arg2 ... argNThis reduces all the work we did earlier in the interactive session to a single call to kermit allowing easy integration with an existing build workflow to automatically upload and run the newly built binary.
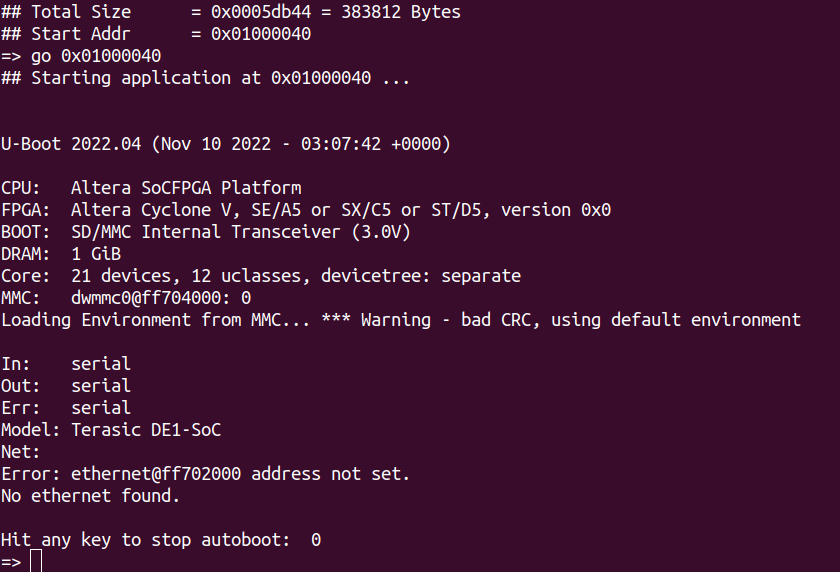
To manually verify the upload succeeded we can replace the EXIT with the CONNECT command which will take us right into the U-Boot serial where we can see the U-Boot output from the successful file transfer as well as the reboot output:
Conclusion
By leveraging ckermit’s scripting functionality it can be a powerful tool in automated workflows to streamline and optimize processes. We’ve shown a simple example in this tutorial that can be extended to other use-cases or integrated into more complex workflows where changes has to be applied and tested on an external target.